
Introducing Google Apps Script - use JavaScript to automate your G Suite account.
At The Floow, like many businesses we use G Suite (Google Mail, Google Calendar, Google Drive, etc.). A few months ago I stumbled across Google Apps Script at work.
Apps Script is a scripting language for light-weight application development in the G Suite platform
I've always been one for automating everything that I can, and now that I've found I can write scripts (in JavaScript) to work with the G Suite apps my productivity has had a considerable boost.
In this post I will cover:
- How to get started with Apps Script
- Explain the difference between a bounded and standalone Apps Script
- Explain how to use Apps Script through a mail merge example
- Introduce Simple and Installable triggers
Let's begin!
Getting Started
You can access an Apps Script via Google Drive. Typically, you'd use to the New button to create a new file.
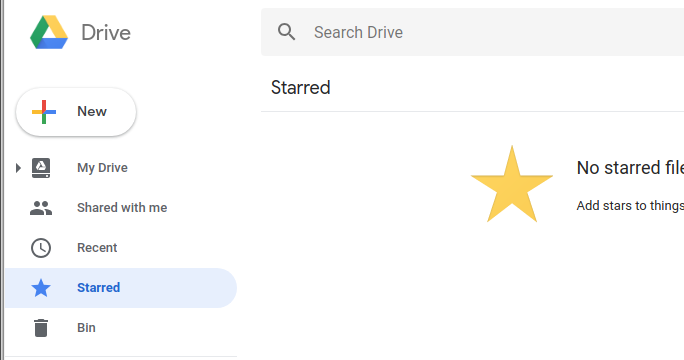
If you've never used Apps Script before you won't see a menu item for it.
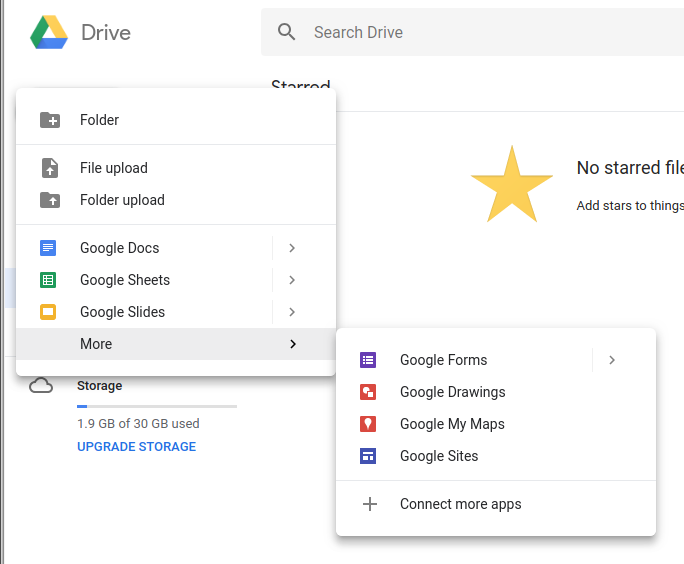
Under More use the Connect more apps menu option, and search for "Google Apps Script". Click Connect on the Google Apps Script entry.
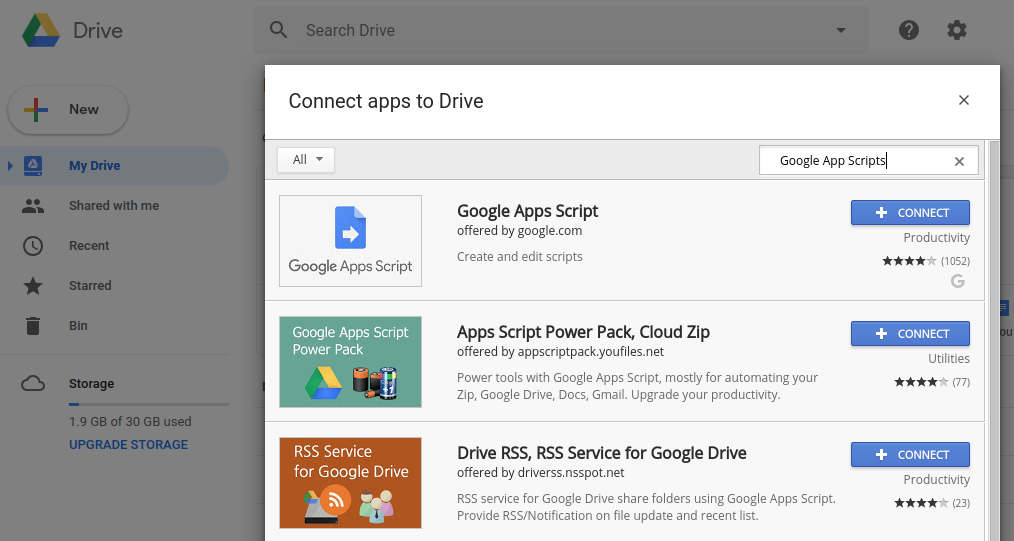
If you refresh your browser page, you'll now be able to create new Google Apps Script files under the More submenu. An Apps Script created independently of a Google Doc, Sheet or Form is known as a standalone project.
You can also create an Apps Script using the Script editor menu item from the Tools menu of a Google Drive file (e.g., Doc, Sheet or Form):
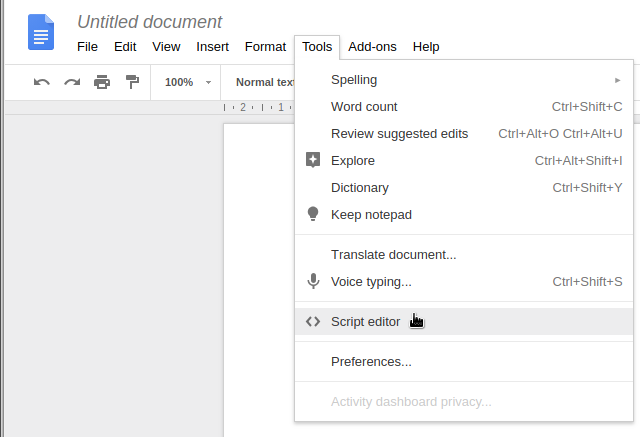
When you use the script editor from a Doc, Sheet or Form, your script project is bound to the script container (the Doc, Sheet or Form).
Note that a script container controls the sharing setting of the Apps Script. So if you share a spreadsheet that has an Apps Script, anyone you share the sheet with will have access to the Apps Script.
Mail Merge Example
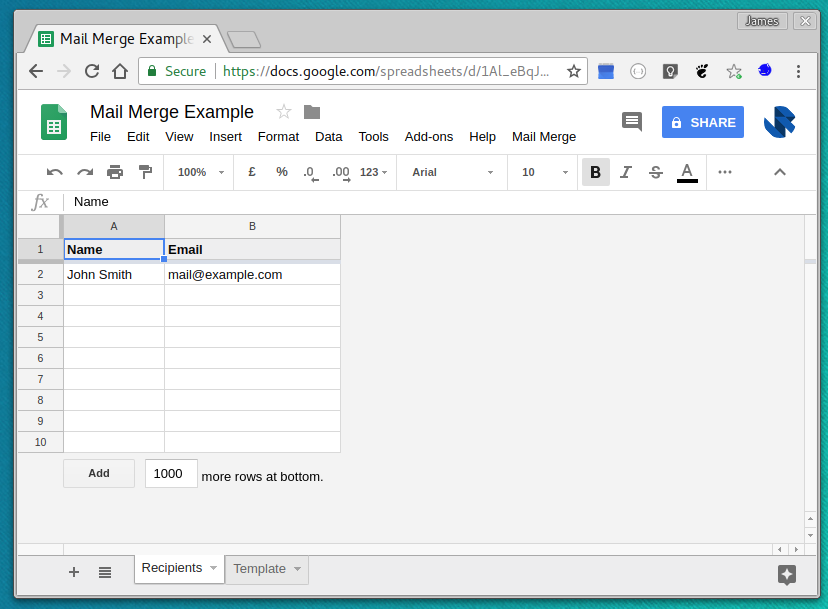
In this example, I'll take you through the process of setting up a spreadsheet that can perform a mail merge.
Create two sheets in a new spreadsheet, one to list contacts and the other to contain the email template:
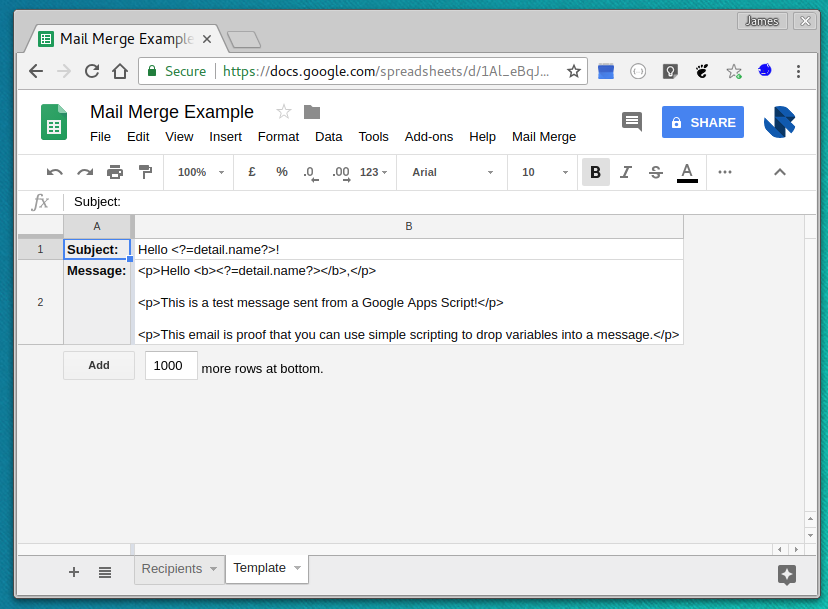
The template for our subject and message will support variable substitution. <? and ?> tags can be used to include inline JavaScript.
Under the Tools menu open the Script editor.
Implementing a Mail Merge
The idea behind this approach is that the recipient sheet can contain a list of names and emails to contact. The user will select the rows they want to email and use a Mail Merge menu item to send emails to the selected rows.
We will need to implement:
- A Mail Merge menu
- A process to determine selected rows in the Recipients sheet.
- Have the user confirm that they want to send the emails
- Sent the emails using the templates defined in the Template sheet.
Let's start by adding the menu item:
function onOpen() {
  // This function will be triggered when the the spreadhseet is opened to add a menu option for sending out the emails.
  var ui = SpreadsheetApp.getUi();
  ui.createMenu('Mail Merge')
      .addItem('Send Emails (selected rows)', 'emailSelectedRows')
      .addToUi();
}

function emailSelectedRows() {
    // TODO
}
The above code has a function onOpen() that when executed will add a menu with a menu item. When a user clicks on the menu item, this will invoke the emailSelectedRows() which we are yet to implement.
We need to tell Apps Script that we want the onOpen() function to run whenever a user opens the spreadsheet. We can do this by setting up a trigger via the Current project's triggers menu item in the Edit menu.
Add a new trigger and set onOpen() as a From spreadsheet trigger that should happen On Open:
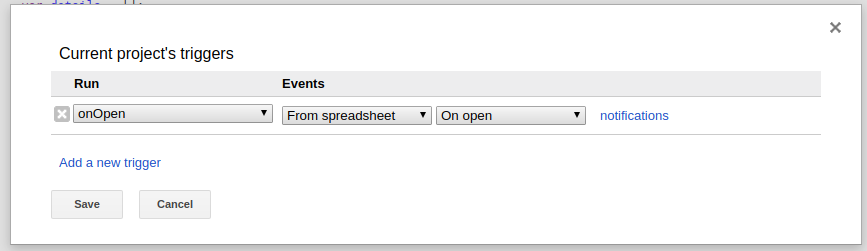
Note that the notifications link can be used to configure email recipients to notify when a trigger fails to execute.
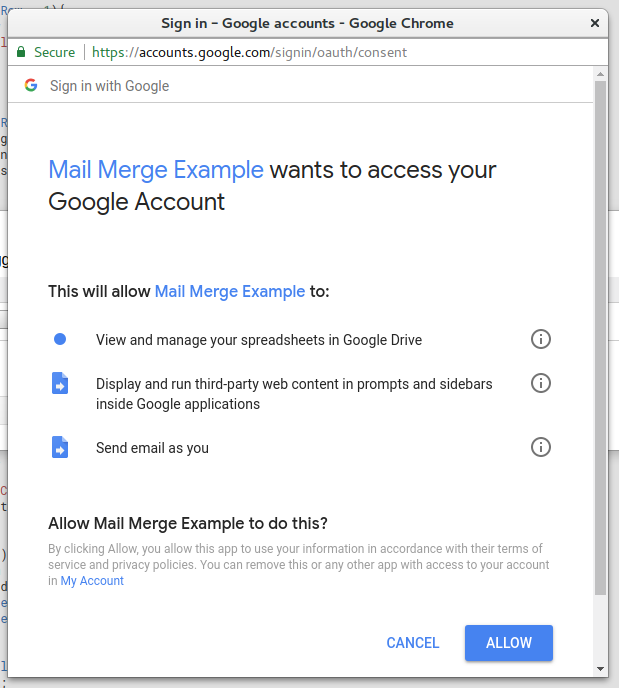
As we develop the code and run the Apps Script will ask you to review and grant permissions so that it can access the relevant functionality in your G Suite account. You may see a prompt like this as we develop the code:
Define a Details object that can be used to hold the name and email for each recipient:
function Details(name, email) {
  // "Details" object to encapsulate name and email
  this.name = name;
  this.email = email;
}
Flesh out the implementation of emailSelectedRows. This is a straightforward workflow that will call out to confirmEmail and sendEmails functions that will need implementing later.
function emailSelectedRows() {
  var ui = SpreadsheetApp.getUi();

  // Use the "Recipients" sheet and find the first and last row of the active selection
  var sheet = SpreadsheetApp.getActive().getSheetByName("Recipients");
  var firstRow = sheet.getActiveRange().getRow();
  var lastRow = sheet.getActiveRange().getLastRow();

  // Sanity check and alert the user
  if (firstRow == 1 || lastRow ==1) {
    Logger.log("Invalid row selection! Do not select the header.");
    ui.alert("Error", "Invalid row selection! Do not select the header.", ui.ButtonSet.OK);
    return;
  }

  var details = [];

  // Iterate over the selected rows
  for (var rowIndex = firstRow; rowIndex <= lastRow; rowIndex++) {
    var name = sheet.getRange(rowIndex, 1).getValue();
    var email = sheet.getRange(rowIndex, 2).getValue();

    if (email != null && email != "")  {
      // Only add details if the email is not null or empty
      var detail = new Details(name, email);
      details.push(detail);
    }
  }

  // Sanity check to make sure that the details array is not empty
  if (details.length == 0) {
    Logger.log("You have not selected any rows with an email address!");
    ui.alert("Error", "You have not selected any rows with an email address!", ui.ButtonSet.OK);
    return;
  }

  // Don't continue if the user is not happy with the selected list of people to email
  if (!confirmEmail(ui, details)) {
    Logger.log("User cancelled send email action");
    return
  }

  // Send emails and confirm to the user that the task has been completed.
  sendEmails(details);
  ui.alert("Task Complete!", "All emails have been sent!", ui.ButtonSet.OK);

}
Via the SpreadsheetApp API we will use the UI functionality to prompt the user to check that they are happy to go ahead and email the recipients:
function confirmEmail(ui, details) {
  // This method will show an alert box asking us to confirm that we want to email the listed recipients
  var msg = "Send emails to:\n\n";
  for (var i = 0; i < details.length; i++) {
    msg += details[i].email + "\n";
  }
  var response = ui.alert('Continue?', msg, ui.ButtonSet.YES_NO);
  return response == ui.Button.YES;
}
Finally, sendEmails needs implementing to take the templates that were defined in the Template sheet and evaluate the content for the given details. The Apps Script APIs provides an HtmlService which that we will use for creating a HtmlTemplate and evaluating the contents.
function sendEmails(details) {
  // Load the template from the "Template" sheet
  var templateSheet = SpreadsheetApp.getActive().getSheetByName("Template");
  var subject = templateSheet.getRange(1, 2).getValue();
  var message = templateSheet.getRange(2, 2).getValue();

  // Iterate over details
  for (var i = 0; i < details.length; i++) {
    var detail = details[i];

    // Use the HtmlService to create an HtmlTemplate and add details as an attribute of the template
    var subjectTemplate = HtmlService.createTemplate(subject);
    subjectTemplate.detail = detail;

    // Use the HtmlService to create an HtmlTemplate and add details as an attribute of the template
    var messageTemplate = HtmlService.createTemplate(message);
    messageTemplate.detail = detail;

    Logger.log("Emailing: %s", detail.email);

    // Send the email
    MailApp.sendEmail({
      name: "Mail Merge Example",
      to: detail.email,
      subject: subjectTemplate.evaluate().getContent(),
      htmlBody: messageTemplate.evaluate().getContent()
    });

  }

}
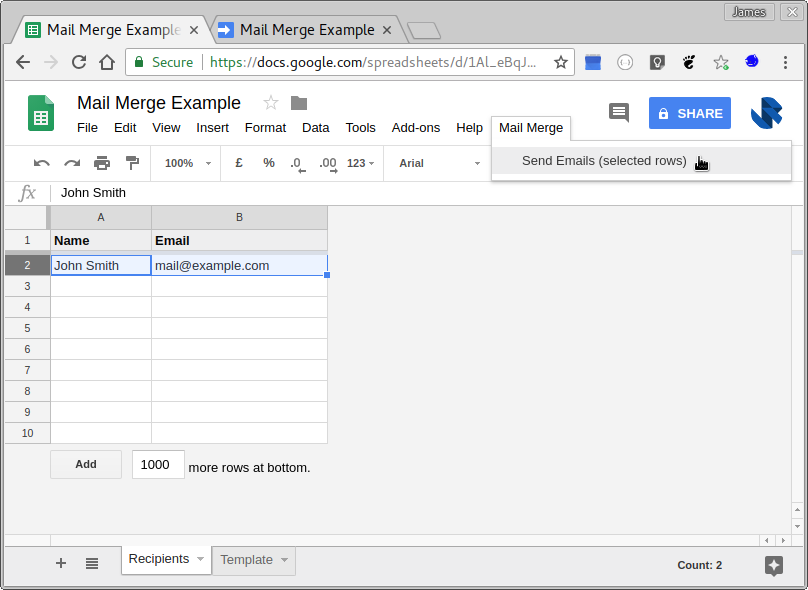
Save the changes and reload the spreadsheet. You'll find a Mail Merge menu item is now part of the menu bar.
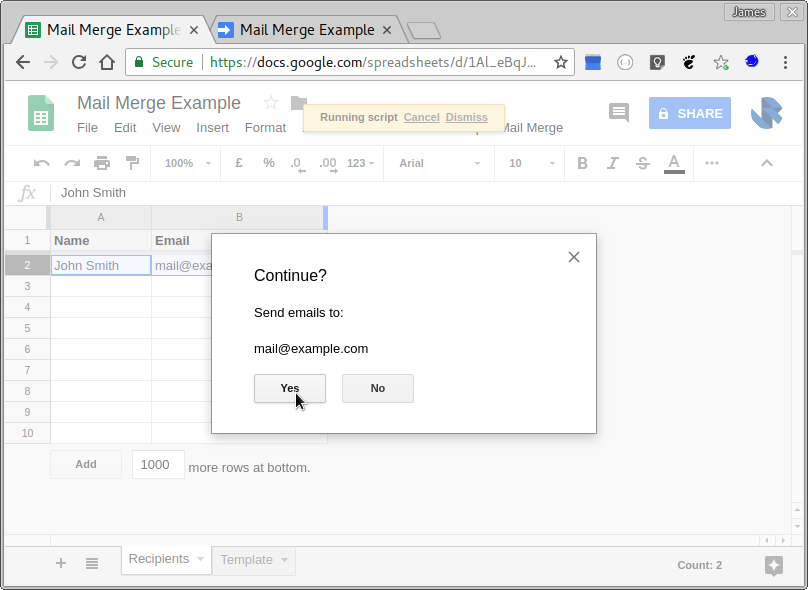
Confirm that you would like to send the emails:
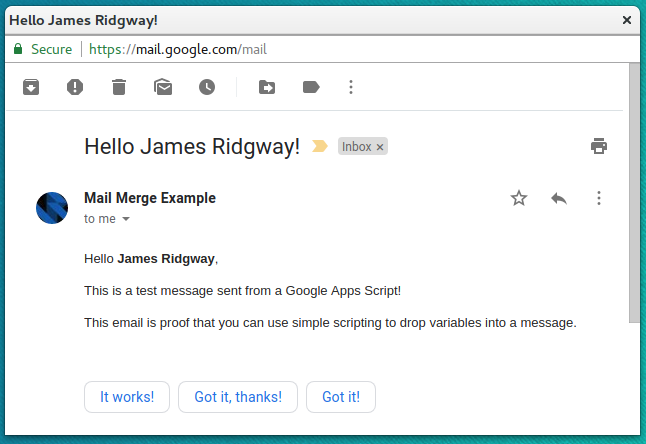
The result is a mail merge email sent to your recipient:
And that's it! A full example of how to use Apps Script to produce a mail merge tool.
I have publicly shared this Mail Merge Example. If you plan to use it make sure to Make a copy... via the File menu.
Triggers
Apps Script uses triggers to know which function to invoke.
In the mail merge example, opening the spreadsheet caused a trigger to fire that invoked a function.
With App Scripts any code has to be initially invoked with a trigger this can be a Simple Triggers or an Installable Triggers depending on the situation.
Simple Triggers
A simple trigger will run for the current user. Simple triggers only support a small set of defined event types for Google Apps.
Examples of simple triggers are:
onOpen(e)runs when a user opens a spreadsheet, document, or form that the user has permission to edit.onEdit(e)runs when a user changes a value in a spreadsheet.
Simple triggers will fire automatically for the current user without asking the user for authorization. As a result, there are some restrictions for simple triggers (see the full list of restrictions):
- The script must be bound (created via the Tools > Script Editor menu item) to a Google Sheets, Docs, or Forms file.
- They do not run if a file is opened in read-only (view or comment) mode.
- They cannot access services that require authorization. For example, a simple trigger cannot send an email because the Gmail service requires authorization, but a simple trigger can translate a phrase with the Language service, which is anonymous.
- They can modify the file they are bound to, but cannot access other files because that would require authorization.
- They cannot run for longer than 30 seconds.
Simple Trigger are not associated with a specific user, so if a Google Sheets, Doc, etc. is shared with others the bound script will automatically apply the Simple Triggers for any user accessing the shared resource subject to the restrictions.
Installable Triggers
Installable triggers are more powerful than simple triggers. They have fewer restrictions, more trigger types are available, and they can be applied programmatically.
| Event | Simple Triggers | Installable Triggers |
|---|---|---|
| Open | Sheets Forms* Docs |
Sheets Forms* Docs |
| Edit | Sheets | Sheets |
| Install | Sheets Forms Docs |
|
| Change | Sheets | |
| Form submit | Sheets Forms |
|
| Time-driven | Sheets Forms Docs Sites Standalone |
|
| Get | Sites Standalone |
|
| Post | Sites Standalone |
*The open event for Google Forms does not occur when a user opens a form to respond, but rather when an editor opens the form to modify it.
With installable triggers you can create a time-driven trigger that operates similarly to a Unix cron job:
function createTimeDrivenTriggers() {
  // Trigger every 6 hours.
  ScriptApp.newTrigger('myFunction')
      .timeBased()
      .everyHours(6)
      .create();

  // Trigger every Monday at 09:00.
  ScriptApp.newTrigger('myFunction')
      .timeBased()
      .onWeekDay(ScriptApp.WeekDay.MONDAY)
      .atHour(9)
      .create();
}
Trigger execution does differ between a simple trigger and an installable trigger. With a simple trigger, the trigger is invoked in the context of the user that causes the trigger to fire.
If you setup a simple open trigger this will run as the user who opens the sheet. Installable triggers, however, will run as the user that creates the trigger.
The Power of Automation
With the mail merge example, I have covered the basics of Google Apps Script. You'll find that the Apps Script website has rich documentation for the different APIs that you can use with Apps Script.
There are so many things that you can do with Apps Script to simplify your job and automate tasks. I'll share with you a few ideas which are inspired by how I use Apps Script in my job.
Automate Your Calendar
We use a rota to handover responsibilities from one team member to another. That rota spreadsheet uses a time-driven trigger to schedule handover meetings between the relevant persons automatically.
You can also use a standalone script to monitor events that get added to your calendar. Calendar Attachment Monitor is an example that looks for meetings that look like functional specification reviews and reminds the creator of the event to attach the relevant specifications if the event has no attachments.
Disclaimer: I've written this as a demo of what is possible, I don't use it (yet), although the scenario is very tempting
Automate Your Inbox - simulating a "new email" event
Apps Script doesn't provide a native "new email" trigger. Inspite of this you can still build powerful functionality using regular time-driven triggers in a standalone script.
Labels and filters in Google Mail combined with a time-based trigger can simulate a "new email" event.
I receive metric update emails which are automated high-level metric emails from some of our systems.
I have configured gmail with the following nested labels:
|- Metric Updates
   |- Unprocessed
   |- Processed
A filter in Google Mail will cause metric updates to:
- Skip inbox
- Mark as read
- Apply label "Metric Updates/Unprocessed"
Every hour a time-driven trigger picks up the emails in the "Metric Updates/Unprocessed" label, processes them (adding aggregated stats to a spreadsheet) and moved the emails to the "Metric Updates/Processed" label.
Most of my colleagues haven't heard of Google Apps Script, it's a powerful and underutilised feature of G Suite that's been hidden away. In this post I've covered the basics and core features of Apps Script, provided some worked examples and seeded a few ideas of how you can script away some of the manual tasks you currently do in your G Suite account.